
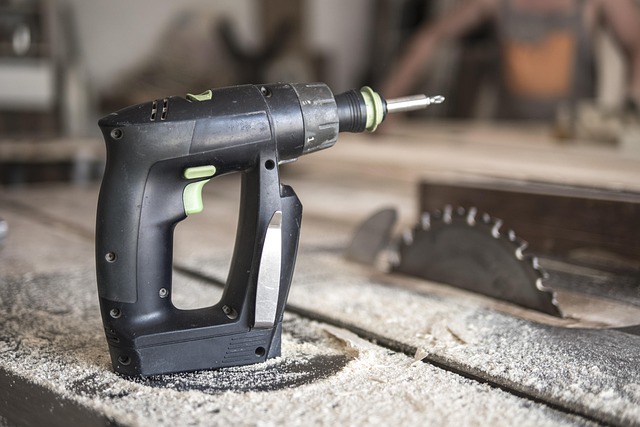
How To Use A Table Saw For Precision Cuts With 5 Simple Jigs
5 Simple Table Saw Jigs Any DIY Woodworker Can Use
Precision in woodworking depends on control, repeatability, and safety. A table saw, when paired with well-designed jigs, transforms from a basic cutting tool into a platform for joinery and fine craftsmanship. These five jigs—crosscut sled, tapering jig, tenoning jig, box joint jig, and thin rip jig—offer professional-grade accuracy without complex machinery. Each one addresses a specific challenge: alignment, angle consistency, or repeatable sizing. For experts who already know how to use a table saw efficiently, mastering these jigs refines workflow and results in cleaner cuts and tighter joints.
Table Saw Precision and Safety
Accuracy and safety are inseparable in professional woodworking. Even minor misalignments can ruin an entire batch of parts or cause dangerous kickback. A precise setup not only improves output quality but also reduces risk during operation.
The Importance of Accuracy in Woodworking
Precision defines the difference between hobby-level craftsmanship and professional joinery. When multiple pieces must fit seamlessly—like cabinet doors or frame assemblies—each cut’s accuracy compounds across the project. Inconsistent cuts create gaps that weaken joints or distort alignment. Maintaining uniformity ensures every component fits squarely and functions as intended.
Essential Safety Protocols for Table Saw Operation
Before powering on any table saw, operators should inspect blade alignment and fence calibration. A misaligned blade can pinch stock or deflect material mid-cut. Safety accessories like push sticks, featherboards, and guards keep hands clear of danger zones while maintaining steady feed pressure. Dull or damaged blades increase friction and burning; regular inspection prevents kickback incidents that can occur even with experienced users.
Setting Up the Table Saw for Optimal Performance
A table saw’s performance depends largely on its calibration. Proper alignment between the blade, miter slots, and fence determines both accuracy and user safety during repetitive operations.
Calibrating the Blade and Fence Alignment
The first step is checking that the blade runs parallel to the miter slots using a dial indicator or precision gauge. This ensures that workpieces travel straight through the cut without binding. The rip fence should then be adjusted to match this alignment precisely; even a fraction of a degree off can lead to tapered cuts unintentionally. Digital angle finders help verify bevel settings when cutting miters or compound angles.
Choosing the Right Blade for Each Cut Type
Selecting the correct blade type influences surface finish and efficiency. Crosscut blades with higher tooth counts deliver smooth edges across end grain, while rip blades with fewer teeth excel at fast cuts along grain direction. Combination blades balance both needs for general-purpose use—a practical choice in small workshops handling varied tasks daily.
Jig 1: Crosscut Sled for Perfectly Square Cuts
Among all jigs built for table saws, the crosscut sled stands out as fundamental. It transforms standard crosscuts into consistently square results across wide panels or small parts alike.
Design Principles of a Crosscut Sled
A stable base slides within dual miter slots to maintain straight motion relative to the blade path. Twin runners minimize lateral play that causes inaccurate cuts. The rear fence acts as a fixed 90-degree reference edge against which stock is positioned before cutting.
Using a Crosscut Sled Effectively
For accurate results, each workpiece should rest firmly against the rear fence before initiating the cut. Stop blocks attached along this fence allow repeatable lengths without constant re-measurement—a time-saver during production runs. Applying paste wax on runners keeps movement smooth and consistent over time.
Jig 2: Tapering Jig for Angled Workpieces
Cutting tapers by hand introduces too much variability; this jig provides controlled adjustment over angle and length along each board face.
Constructing a Reliable Tapering Jig
The key elements are adjustable arms that set different taper angles depending on stock dimensions. Secure clamping prevents shifting under pressure from the spinning blade. Non-slip surfaces such as rubberized pads add further stability during passes.
Applying the Tapering Jig on the Table Saw
Aligning the jig parallel to the blade establishes baseline accuracy before adjusting taper width at one end of the board. Multiple shallow passes reduce tear-out risk while maintaining full control over feed speed. Consistent feed rate produces an even surface finish across all tapered sections.
Jig 3: Tenoning Jig for Joinery Precision
Tenons form structural connections in furniture frames or doors; achieving tight fits requires millimeter-level precision.
Building an Adjustable Tenoning Jig
An effective tenoning jig holds material vertically against the saw table while sliding alongside the fence or miter slot track. Micro-adjustment knobs fine-tune tenon thickness incrementally until it fits perfectly into its mortise counterpart. Heavy-duty construction minimizes vibration during vertical passes across dense hardwoods.
Techniques for Cutting Clean Tenons on a Table Saw
Position shoulder lines accurately relative to blade height before cutting cheeks in successive passes rather than removing all waste at once. Frequent test-fitting between cuts avoids over-thinning tenons that would compromise joint strength.
Jig 4: Box Joint Jig for Interlocking Corners
Box joints combine strength with visual appeal—ideal for drawers or decorative boxes where exposed joinery becomes part of design aesthetics.
Configuring a Box Joint Jig Setup
This jig uses indexing keys spaced equally apart to define finger width between cuts made by a dado stack or standard blade set close together. It mounts securely onto either a miter gauge bar or crosscut sled base so each pass aligns perfectly with previous ones.
Executing Box Joints with Accuracy
Before starting, set dado width equal to intended finger size; even slight mismatches affect fit quality later. Feed boards steadily through each indexed position while maintaining identical rhythm across both mating pieces. After cutting, light sanding removes burrs but preserves tight interlocking geometry crucial for glue bonding strength.
Jig 5: Thin Rip Jig for Uniform Narrow Strips
Thin rips are often used for edge banding or decorative trim yet pose safety risks if done freehand near spinning blades—this jig eliminates those hazards efficiently.
Designing a Thin Rip Jig System
Mounted directly onto the rip fence rather than referencing from blade edge, this system uses adjustable stop blocks allowing precise strip thickness below one inch repeatedly without recalibration each time. Integrated bearing rollers support smooth feeding motion through narrow gaps safely away from direct contact zones.
Operational Method for Consistent Thin Rips
Set stop distance equal to desired strip width prior to starting saw power cycle; maintain firm but gentle pressure using push sticks throughout feed process until material clears blade completely into catch tray beyond cutting line—preventing rebound hazards common with lightweight strips.
Advanced Tips for Enhancing Precision with Jigs
Even expertly crafted jigs require periodic checks; humidity changes alone can shift wooden components slightly enough to affect squareness or spacing tolerances critical in fine joinery projects.
Maintaining Calibration Over Time
Inspect runners periodically for wear marks that may introduce play inside miter slots causing deviation mid-cut. Re-square fences after seasonal temperature changes since wood expansion alters geometry subtly yet measurably over months of use.
Integrating Digital Measuring Tools with Traditional Jigs
Modern digital calipers confirm final dimensions instantly after each setup adjustment while laser guides project exact cut lines visible under bright shop lighting—bridging traditional craftsmanship methods with contemporary measurement precision workflows favored by advanced professionals today.
Optimizing Workflow Efficiency in Professional Workshops
Efficient organization distinguishes production shops from hobby spaces; quick access reduces downtime between operations when switching setups frequently throughout complex builds involving multiple jigs per project phase.
Organizing Jigs for Quick Access and Setup Changes
Label every jig clearly by function plus compatible blade type using durable tags resistant to dust accumulation common around saw stations; vertical wall-mounted racks prevent warping from prolonged horizontal storage under varying humidity levels typical inside active woodworking environments.
Streamlining Production Through Repeatable Systems
Standardizing reference points like zero positions across all fixtures simplifies recalibration cycles dramatically; documenting preferred setup parameters within shop manuals allows seamless transitions between operators ensuring consistent outcomes regardless of personnel rotation schedules often seen inside professional fabrication facilities worldwide.
FAQ
Q1: What’s the safest way to learn how to use a table saw?
A: Begin with formal instruction focusing on proper stance, push-stick techniques, and understanding kickback physics before performing unsupervised cuts on live material.
Q2: How often should table saw blades be replaced?
A: Replace blades once burn marks appear despite cleaning or sharpening efforts—typically after several hundred feet of hardwood ripping depending on density levels encountered regularly.
Q3: Can aluminum jigs outperform wooden ones?
A: Aluminum versions resist seasonal movement better though costlier initially; they maintain calibration longer especially under fluctuating shop climates where wood expands unpredictably over time.
Q4: Why do some operators prefer dado stacks over single-kerf blades?
A: Dado stacks remove wider sections cleanly within fewer passes ideal when crafting joints like box fingers reducing cumulative error risk inherent in multiple sequential kerf alignments using standard thin blades alone.
Q5: Is waxing sled runners really necessary?
A: Yes—it decreases friction drastically improving feel during feed motion while preventing sudden jerks mid-cut which could otherwise compromise both accuracy level achieved per pass and operator control stability overall.