
How To Use A Miter Saw Safely Vs The 5 Most Dangerous Cutting Errors
5 Of The Worst (And Most Dangerous) Ways To Use A Miter Saw
A miter saw is one of the most precise and versatile tools in woodworking, but it’s also among the most dangerous when misused. The worst mistakes often come from overconfidence, neglecting safety mechanisms, or skipping preparation steps. Experts agree that even experienced operators can fall into unsafe habits that increase injury risk. The five errors detailed here—cross-handed cuts, unsecured workpieces, freehand cutting, using dull blades, and ignoring kickback prevention—represent the most hazardous ways to use a miter saw. Knowing how to use a miter saw safely means mastering both technique and discipline.
The Fundamentals of Miter Saw Safety
Professional workshops emphasize that safety starts before the blade ever touches wood. A well-prepared environment and an operator who respects the tool’s power are essential for consistent results and long-term reliability.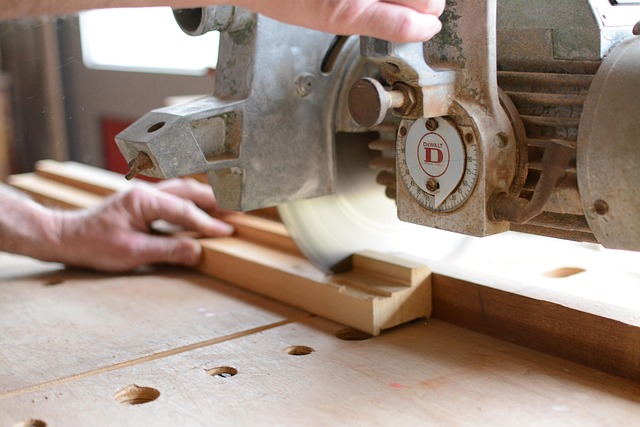
The Core Principles of Safe Miter Saw Operation
A stable work surface prevents vibration and shifting during cuts. The saw should be set on a level bench with secure mounting bolts to avoid movement. Operators must wear protective gear—eye protection, hearing guards, and dust masks—to reduce exposure to debris and noise. Good lighting and a clean workspace improve visibility and reaction time, lowering accident potential.
Key Components and Their Safety Functions
Each part of a miter saw contributes to its safe operation. Blade guards protect against accidental contact during spin-down. Fences guide material alignment, while clamps hold pieces steady under load. Regular alignment checks keep cuts straight and reduce binding. For both corded and cordless models, electrical safety means inspecting cords for wear, avoiding wet surfaces, and disconnecting power before maintenance.
Proper Techniques for Using a Miter Saw Safely
Once setup is complete, correct handling determines whether each cut will be clean or dangerous. Even small lapses in preparation can lead to unpredictable blade motion or loss of control.
Pre-Operation Inspection and Preparation
Before powering up, inspect the blade for chips or warping. A dull or damaged edge increases friction and heat buildup. Confirm that guards move freely and that all switches function properly. Adjust angles carefully using calibrated scales; then clamp materials firmly against the fence before cutting.
Correct Body Positioning and Cutting Motion
Operators should stand with feet shoulder-width apart for balance, keeping hands outside the blade path at all times. Allow the motor to reach full speed before contacting material—this prevents jerky starts that can throw off accuracy. After completing a cut, wait until the blade stops spinning before lifting it or removing stock to avoid kickback.
The Five Most Dangerous Cutting Errors with a Miter Saw
Even seasoned craftsmen make mistakes when rushing through repetitive tasks or ignoring fatigue signals. These five errors are responsible for most severe injuries in professional shops.
1. Cross-Handed Cutting Technique
Cross-handed cutting happens when one hand crosses over the blade path to hold material on the opposite side. This position drastically reduces control if the wood shifts unexpectedly, placing fingers directly in harm’s way. Instead, materials should always be supported on the same side as the operating hand while using clamps or stops for stability.
2. Cutting Without Securing the Workpiece
Loose boards can twist or lift during rotation, causing sudden binding between blade teeth and grain fibers. This often leads to kickback powerful enough to throw material across a room. Clamping systems or hold-down devices keep stock fixed against both fence and table surfaces for predictable motion throughout each cut.
3. Making Freehand or Unsupported Cuts
Freehand cutting removes the fence from play—the one element designed to maintain straight alignment under pressure. Without it, precision disappears and control weakens as wood moves unpredictably against spinning teeth. Always use fences or jigs built for specific angles; support extensions help handle longer boards without sagging at ends.
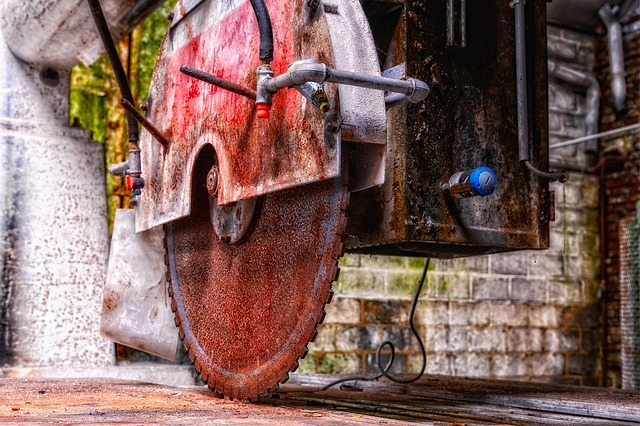
4. Operating with a Damaged or Dull Blade
A worn blade doesn’t slice—it scrapes—and this friction raises temperature fast enough to scorch wood or seize bearings inside the motor housing. Signs include smoke trails, burn marks on edges, or excessive noise during operation. Replace blades showing chipped carbide tips immediately to preserve both accuracy and mechanical health.
5. Ignoring Kickback Prevention Practices
Kickback occurs when trapped fibers close around teeth mid-cut, forcing material backward toward the operator at high speed. Causes include pinched kerfs or forcing cuts too quickly through dense hardwoods. Keeping firm downward pressure on handles while letting speed—not force—do the work minimizes this hazard significantly.
Advanced Safety Practices for Experienced Operators
Veteran users often adopt precision accessories not only for accuracy but also for added protection during complex projects involving compound angles or repetitive production runs.
Integrating Precision Tools and Accessories for Safer Cuts
Laser guides project cut lines clearly across varying light conditions, helping align stock without test passes that expose fingers near blades. Digital angle gauges confirm bevel settings within fractions of a degree—vital when matching trim corners across large installations. Dust extraction systems clear airborne particles that obscure vision while reducing respiratory irritation over time.
Maintenance Routines That Enhance Long-Term Safety Performance
Resin buildup around moving joints restricts guard motion; regular cleaning keeps these parts responsive under load changes. Bearings should rotate freely without grinding sounds; brushes in electric motors need periodic inspection every few hundred hours of use depending on workload intensity.
Building a Culture of Safety in Professional Workshops
Beyond individual skill lies collective responsibility: teams thrive where safe habits are shared openly rather than left unspoken between colleagues working side by side at high-speed tools.
Training and Continuous Skill Development Among Teams
Structured training sessions reinforce proper stance, clamping methods, and inspection routines across all operators regardless of seniority level. Peer review encourages honest feedback about risky shortcuts observed during production cycles—helping maintain consistency with current industry safety codes such as those outlined by ISO standards for machinery operation.
Creating an Environment That Prioritizes Safe Tool Usage
Workshop layout plays an underrated role in preventing accidents: adequate space between stations avoids crowding near active blades; clear signage reminds staff about PPE requirements; emergency shutoff switches remain accessible from every workstation within arm’s reach during critical moments.
FAQ
Q1: What is the safest way to learn how to use a miter saw?
A: Begin under supervision from an experienced operator who demonstrates correct posture, clamping methods, and startup sequence before independent practice sessions begin.
Q2: How often should miter saw blades be replaced?
A: Replacement intervals depend on usage frequency but generally occur after noticeable dullness appears—often every few months in professional environments handling dense hardwoods daily.
Q3: Can cordless miter saws be as safe as corded ones?
A: Yes; modern cordless models include identical guard designs and brake systems though battery condition must remain monitored since low voltage can affect motor response timing slightly.
Q4: Why does kickback happen even with proper clamping?
A: Internal stress within wood fibers sometimes releases unpredictably during cutting; maintaining moderate feed pressure helps absorb these shifts without violent reaction forces transferring through handles.
Q5: Are laser guides necessary for accurate cuts?
A: Not mandatory but highly beneficial—they reduce reliance on manual marking lines while improving visibility when working under mixed lighting conditions common in large workshops.