
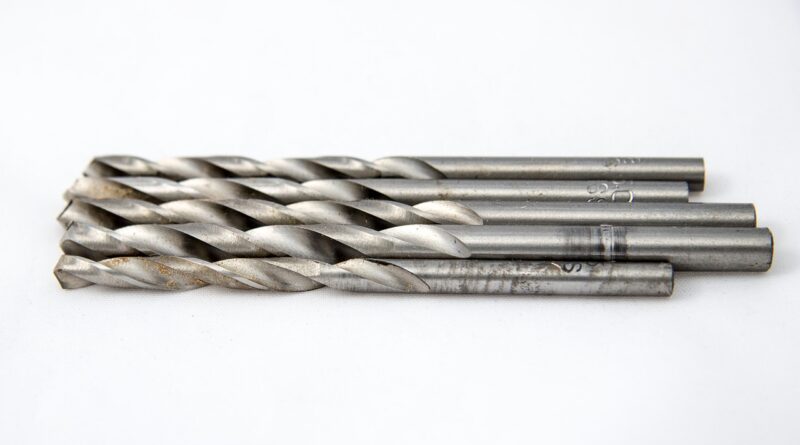
Drill guides for portable drills and how to use them accurately
What a drill guide does for a portable drill
Drill guides for portable drills help control hole angle, position, and depth when the workpiece cannot be brought to a drill press. They do not turn a handheld drill into a full machine tool, but they can reduce bit wander, improve repeatability, and make awkward drilling positions easier to manage. The right guide is especially useful on large panels, installed cabinets, posts, round stock, shelving projects, dowel work, and angled holes where freehand drilling is difficult to keep square.
Most portable drill guides are based on one of three approaches: a bushing that steers the bit, a base that references the work surface, or a sliding carriage that holds the drill on guide rods. Some models combine these features. The main benefit is not only accuracy, but consistency. For one hole in a hidden bracket, careful freehand drilling may be enough. For six matching shelf-pin holes, centered dowel holes, or a straight through-hole in thick material, a guide becomes much more valuable.
For more practical tool setup topics, see the Taodili guides section.
Main types of portable drill guides
The term drill guide covers several different accessories, and the right style depends on the problem you need to solve. A compact bushing block is not the same as a plunge-style guide, and a doweling jig is not intended for every general drilling task.
| Guide type | Best use | Main limitation |
|---|---|---|
| Drill block or bushing guide | Quick 90-degree holes in wood, plastic, or soft materials | Limited depth control and little support for large bits |
| Plunge-style portable drill guide | Straight holes, repeat depths, angled holes, and workpieces too large for a drill press | Bulkier setup and still less rigid than a drill press |
| Doweling or self-centering guide | Centered holes on board edges and joinery layouts | Not a general-purpose guide for wide panels or large holes |
| Template or jig with bushings | Repeated hole patterns such as hardware, fixtures, or production layouts | Requires accurate template layout before drilling |
| Angle guide | Furniture legs, stair parts, angled fasteners, and repair work | Angle scales must be checked against the real work setup |
A drill block is the simplest option. It is small enough for a toolbox, and its guide holes help keep common bit sizes close to square. It works best when the bit fits the bushing closely and the surface is flat. It offers limited help with chip clearing, depth control, or longer bits that can flex after leaving the guide.
A plunge-style guide works more like a portable drill press. The drill mounts to a shaft or chuck carrier, and the assembly slides along rods toward the work. Better versions include a base, depth stop, angle adjustment, handle, and sometimes centering pins or a fence. This style is more versatile, but its results still depend on column stiffness, chuck alignment, and how securely the base is held to the work.
How to choose a drill guide that fits the job
The best guide is the one that controls the specific error you are trying to avoid. Common problems include bit wander at the start, a hole that tilts before breaking through, inconsistent depth, and poor centering on an edge. Match the guide to those issues instead of choosing only by size or price.
Check drill compatibility first
Portable drill guides are not universal in every detail. Some accept common cordless drills through a hex drive shaft, while others use a chuck, collar, or spindle arrangement. Before buying, confirm that your drill can connect securely, the chuck capacity matches your bits, and the guide manufacturer allows the type of drill you plan to use. Many drill guides are intended for standard rotary drilling, not impact drivers or hammer drilling. If the instructions exclude impact or hammer use, treat that as a safety and accuracy limit, not a suggestion.
Look for stiffness before extra features
Rigidity matters more than a long feature list. A guide with loose rods, a flexible plastic base, or a wobbling chuck can still produce angled holes, even if it has a protractor scale and depth stop. When comparing models, check guide rod diameter, bearing or sleeve quality, base size, chuck support, and how the guide locks at an angle. A stable base also makes it easier to clamp the guide without shifting the layout mark.
Match the base to the workpiece
A wide base is useful on flat panels because it resists tipping. A V-groove or centered notch helps on dowels, pipe, and round stock. Mounting holes allow the guide to be screwed to a shop-made auxiliary base, which can add stability on large or awkward pieces. For cabinet work and edge drilling, fences or centering pins may save more time than a wide angle range.
Check depth and clearance
Depth stops are valuable for shelf pins, counterbores, dowel holes, and repeated pilot holes. However, a depth stop only helps if the guide has enough travel and bit clearance for the job. Long twist bits, Forstner bits, hole saws, and countersinks all need different space below the chuck. Check both maximum travel and usable clearance with the guide assembled, not just the advertised chuck size.
Portable drill guide vs drill press
A portable guide and a drill press overlap, but they are not direct substitutes. A drill press normally provides a more rigid column, a fixed table, controlled feed, and repeatable vertical alignment. It is better suited to small parts, repeated shop work, metal drilling within its capacity, precise depth operations, and jobs that benefit from stable speed control.
A portable drill guide is useful when the workpiece is too large, too long, already installed, or too awkward to bring to a drill press. Typical examples include drilling into a mounted cabinet side, a door slab, a fence post, a large tabletop, a benchtop dog-hole layout, or the end of a long rail. In these situations, access is the main advantage.
| Question | Choose a drill guide when | Choose a drill press when |
|---|---|---|
| Can the workpiece be moved safely? | No, it is installed, oversized, or awkward | Yes, it fits on the table and can be clamped |
| How much precision is required? | Good practical alignment is acceptable | Higher rigidity and repeatability are required |
| How many holes are needed? | A small batch in a difficult location | Repeated shop drilling or production work |
| What bit is being used? | Standard twist bits, brad-point bits, countersinks, or moderate-size boring bits | Larger bits, more demanding materials, or tasks needing stable speed and feed |
For many home shops, the practical answer is not either-or. A drill press handles bench work, while a portable drill guide handles jobs the press cannot reach. If you only drill occasional straight holes in large workpieces, a guide may be the more space-efficient purchase. If your work depends on repeatable precision every week, a drill press remains the stronger foundation.
How to set up a portable drill guide for cleaner holes
Most accuracy problems start before the drill is switched on. A guide can only follow the reference you give it, so layout, clamping, and bit choice are as important as the accessory itself.
- Mark from a reliable reference edge. Use a square, marking gauge, or template instead of measuring each hole separately when repeatability matters.
- Make a starting point. In wood, an awl mark can help a brad-point or twist bit start on location. In metal, a center punch is typically used before drilling.
- Choose the right bit. Brad-point bits are helpful in wood because the center spur starts cleanly. Twist bits are general purpose. Forstner bits need more stability and chip clearing.
- Seat the guide fully. Make sure the base sits flat. If the surface is uneven, use a shop-made support block or auxiliary base.
- Clamp when possible. Hand pressure alone can work for light drilling, but clamping improves repeatability and reduces the chance of the guide walking.
- Set angle and depth before drilling. Lock the angle mechanism and test the depth stop on scrap if the final depth matters.
- Start slowly. Bring the bit into the layout point with controlled speed, then increase speed only after the bit is tracking cleanly.
- Clear chips regularly. Deep holes build heat and chips. Back the bit out as needed so the bit cuts rather than rubs.
- Use a backing board for through-holes. A sacrificial board reduces tear-out as the bit exits.
Scrap testing is especially useful for angled holes. The printed scale on a guide is only a starting point. The real angle depends on how the base sits, how the work is supported, and whether the drill carriage has any play. If the hole must meet another part precisely, drill a test piece first and adjust before drilling the final workpiece. See also: Tool Categories.
Common mistakes and how to avoid them
Expecting drill-press accuracy from a flexible setup
A portable guide reduces error; it does not remove every variable. Bit flex, chuck runout, guide play, surface unevenness, and feed pressure can all affect the result. The deeper the hole and the smaller the bit, the more likely the bit is to follow grain, deflect, or bend. Use sharp bits, avoid forcing the feed, and support the guide as close to the hole as practical.
Using the wrong guide for edge drilling
Edge drilling is harder than face drilling because there is less surface to support the guide. A self-centering doweling jig, fence, or auxiliary base is usually better than a small freehand block. If a centered hole is critical, reference both faces of the board and test on an offcut from the same material thickness.
Ignoring chip evacuation
When chips pack in a deep hole, heat rises and the bit can wander. This is common in thick hardwood, plastics that melt easily, and long through-holes. Drill in stages, clear chips, and let the bit do the cutting. A guide helps hold the angle, but it cannot compensate for a clogged or dull bit.
Overtightening or under-tightening locks
Angle locks, depth stops, and chuck keys need enough tension to hold position without damaging the guide. If a guide repeatedly slips, do not keep tightening blindly. Inspect the locking surface, clean dust from the mechanism, and confirm that the guide is assembled correctly.
Safety and maintenance checks
Portable drill guides add control, but they also add more parts around a spinning bit. Safety guidance from organizations such as OSHA and the Canadian Centre for Occupational Health and Safety consistently emphasizes following manufacturer instructions, using suitable personal protective equipment, keeping tools in sound condition, securing the work, and disconnecting or removing power before adjustments or bit changes.
At a minimum, wear eye protection, secure loose clothing, keep hands away from the bit path, and clamp the work when possible. Remove the battery or unplug a corded drill before installing bits, attaching the drill to the guide, changing angle settings, or clearing a jam. Do not try to free a stuck bit by repeatedly starting and stopping the drill. Remove power, back the bit out carefully, and inspect the bit, workpiece, and guide before continuing.
Maintenance is simple but important. Keep guide rods clean, remove pitch and dust buildup, check that the chuck grips evenly, and inspect springs, collars, handles, and angle locks for wear. If the guide has bushings, make sure the bit size matches the bushing closely. A worn bushing or loose chuck can turn an alignment tool into a source of error.
Frequently asked questions
Are drill guides for portable drills worth it?
They are worth it when the workpiece is large, installed, or difficult to hold square by hand. They are especially useful for repeat holes, dowel holes, straight pilot holes, and angled drilling. They are less useful if you already have a drill press and all your work fits safely on its table.
Can a portable drill guide replace a drill press?
For occasional straight holes in large workpieces, it can replace some drill-press tasks. For frequent precision drilling, metal work, larger bits, or production drilling, a drill press is usually more rigid and repeatable.
Why are my holes still not straight with a guide?
The most common causes are a loose guide, an unclamped base, a dull or flexible bit, an uneven surface, too much feed pressure, or a guide that is not square to the work. Test on scrap, clamp the base, and check for play in the chuck and rods.
What drill bit works best with a portable guide?
For clean wood holes, brad-point bits are often a good choice because the center point helps start accurately. Twist bits are suitable for many general tasks. Forstner bits and hole saws may work with some guides, but they need enough clearance, a stable base, and careful feed pressure.
Should I clamp a portable drill guide?
Clamp it whenever accuracy, safety, or repeatability matters. Hand pressure may be enough for a quick light hole, but clamping reduces movement and helps keep the guide aligned through the full drilling stroke.