
How To Use A Chop Saw For Trim Work With Precision And Efficiency
Best Chop Saw For Trim Work: Top Picks You Can’t Miss
Precision trim work relies on the right equipment, and a high-quality chop saw is central to achieving professional results. Among various options, models with fine-tooth blades and stable miter adjustments stand out as the best chop saws for trim work. These saws deliver smooth crosscuts, accurate bevels, and consistent performance across crown molding, baseboards, and casings. For experts seeking both accuracy and durability, investing in a well-calibrated chop saw ensures cleaner joints, less sanding, and faster workflow on every project.
Understanding the Fundamentals of Chop Saw Operation?
Before mastering how to use a chop saw for trim applications, it’s important to know how its components interact to produce clean cuts. Each part plays a specific role in maintaining safety and precision during operation.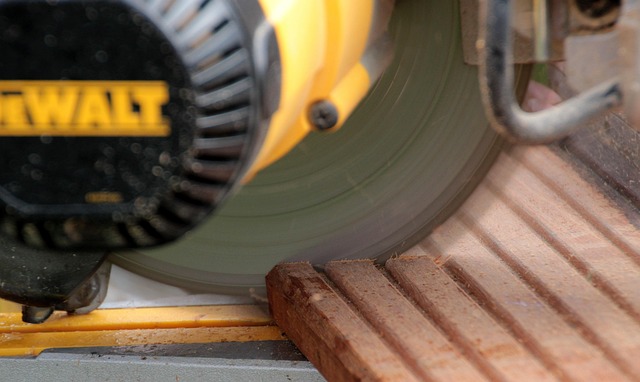
Key Components and Their Functions
A typical chop saw includes a motor that powers the blade, a blade guard that shields the operator from debris, a fence that stabilizes the workpiece, and a miter scale for angle adjustments. The motor’s torque determines cutting capacity, while the fence alignment directly influences cut accuracy. Blade guards should move freely without resistance to maintain visibility and safety. Compound or sliding miter saws differ from standard versions by allowing bevel adjustments or extended crosscut reach—features especially useful when trimming wide moldings or complex angles.
Selecting the Appropriate Blade for Trim Work
Choosing the correct blade is critical for achieving smooth edges on decorative trim. Fine-tooth blades—often with 80 to 100 teeth—are ideal for cutting delicate materials like MDF or hardwood molding. Blade diameter affects depth capacity; most trim specialists prefer 10-inch or 12-inch sizes for versatility. Carbide-tipped teeth improve longevity when cutting dense woods or composites. Regular inspection prevents dullness that causes burn marks or tear-out along painted surfaces.
Preparing for Precision Trim Cutting?
Even experienced carpenters can lose accuracy if their workspace isn’t properly arranged. A stable setup minimizes vibration and improves control during each cut.
Setting Up a Stable Work Area
Position the chop saw on a flat surface such as a sturdy bench or stand. Uneven placement can cause minor shifts that distort miter joints. Ample lighting helps trace fine pencil lines precisely, while extension supports keep long baseboards level during cutting. In professional shops, adjustable roller stands are often used to handle oversized crown pieces safely.
Measuring and Marking Techniques for Accuracy
Accurate measurement defines quality trim work. Combination squares provide reliable right angles, while digital protractors simplify setting compound miters on irregular corners. Marking with a sharp pencil or marking knife ensures thin lines visible under bright light without excessive graphite smudging. Before cutting, verify angles using scrap pieces—a quick test cut can prevent cumulative errors across multiple joints.
Mastering Cutting Techniques for Trim Work?
Once setup is complete, attention shifts to technique—the difference between an average finish and flawless craftsmanship often lies in small habits developed through repetition.
Adjusting Angles and Bevels with Consistency
Calibrating the miter gauge before beginning is essential; even slight deviations can create visible gaps at seams. For crown molding, practice setting both miter and bevel simultaneously to match wall contours accurately. Always lock adjustments firmly before activating the saw to prevent drift mid-cut.
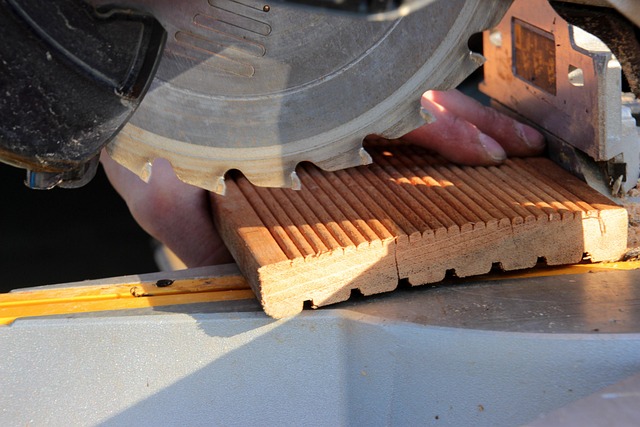
Executing Clean Crosscuts and Miter Cuts
Allow the blade to reach full speed before contacting wood; premature contact can chip edges or stall rotation. Maintain steady downward pressure without forcing progress through dense grain sections. Supporting both sides of the board prevents splintering at exit points—a common issue when cutting narrow casing stock.
Achieving Smooth Finishes on Delicate Trim Pieces
When working with intricate profiles like ogee moldings or chair rails, slower feed rates produce cleaner finishes. Light sanding afterward removes micro-burrs left by high-speed passes. Applying masking tape along painted surfaces before cutting reduces visible chipping—especially useful when trimming prefinished materials onsite.
Enhancing Efficiency During Trim Projects?
Professional trim installers value consistency as much as precision. Organizing workflow around repetitive tasks saves time while maintaining uniform results across rooms.
Organizing Workflow for Continuous Cutting
Batch similar cuts together instead of resetting angles repeatedly; this habit reduces downtime between adjustments. Label each section based on room location or installation order using painter’s tape tags to avoid confusion later. Keeping spare blades nearby allows quick swaps if one dulls mid-project—critical during large-scale installations where deadlines matter.
Maintaining Your Chop Saw for Long-Term Performance
Sawdust buildup affects both accuracy and cooling efficiency of motors over time. Cleaning vents and fences after each session prevents clogging that may alter alignment subtly but significantly over many cuts. Lubricating pivot points ensures smooth motion during frequent bevel changes, while periodic fence calibration keeps every miter joint tight-fitting year after year.
Safety Practices When Using a Chop Saw for Trim Work?
Even seasoned professionals must prioritize safety—precision means little if injury risks increase due to neglect of protective measures.
Essential Protective Gear and Safe Handling Procedures
Always wear safety glasses to block airborne particles from fine trim dust, along with ear protection against prolonged motor noise exposure above 85 dB(A), as recommended by ISO 1999 standards on occupational noise levels. Dust masks reduce inhalation of wood fibers common in MDF trimming tasks. Hands should remain clear of blade paths; clamps secure smaller pieces more effectively than manual holding methods during close cuts.
Preventing Kickback and Material Shifting During Cuts
Kickback typically occurs when material binds against the spinning blade due to improper positioning or warped lumber. Holding boards firmly against fences throughout each cycle minimizes this risk significantly. Avoid forcing twisted stock through—the added resistance increases stress on bearings and blade teeth alike. Allow offcuts room to fall freely rather than catching them mid-drop; interference can jam moving parts unexpectedly.
FAQ
Q1: What type of chop saw is best suited for detailed trim work?
A: A compound sliding miter saw offers superior flexibility because it handles both angled crosscuts and bevels needed for complex moldings like crown profiles.
Q2: How often should blades be replaced when used primarily on wood trim?
A: Typically after 100–200 linear feet of heavy use depending on material hardness; visual signs include burn marks or rough edges along cuts.
Q3: Can aluminum trims be cut using standard wood blades?
A: No, non-ferrous metal blades with specialized tooth geometry are required; standard wood blades dull rapidly against metal surfaces.
Q4: Why does my chop saw leave slight gaps at corner joints?
A: Misaligned fences or inaccurate miter calibration often cause this issue; recalibrate angle settings using test cuts until joints close tightly without filler.
Q5: Is it safe to use extension cords with high-powered chop saws?
A: Yes, but cords must match rated amperage draw; undersized cables cause voltage drops leading to reduced torque or overheating motors during extended sessions.